
Pattaya & Thailand: The Complete First-Trip Guide — Entry Documents, Where to Stay, Weather, Top Spots and Budget
When you’re heading to a new country for the first time, there are more questions than you’d expect: what to sort out before you fly, whether they’ll turn you away at the border, where to change money, which SIM to buy, which neighborhood to stay in, and how much all of it ends up costing. Usually you have to piece the answers together from a dozen articles, videos and chats. I’ve put everything in one place: in order, from prep at home to your first day on the ground and the real budget. Read it once and you’ll have almost every question about Pattaya and Thailand covered.
One important note up front. Thailand’s entry rules and visa-free durations change often, so anything to do with visas, documents and prices I’d recommend double-checking on official sources right before you travel — I’ll give links along the way.
1. Documents: What to Prepare Before You Fly
This is the first and most important block, because this is exactly where people trip up at the border. The good news — there’s nothing complicated here, the whole package comes together in one evening. Let’s go point by point, in the logic of “what you’ll need and why.”
The Thailand Digital Arrival Card (TDAC)
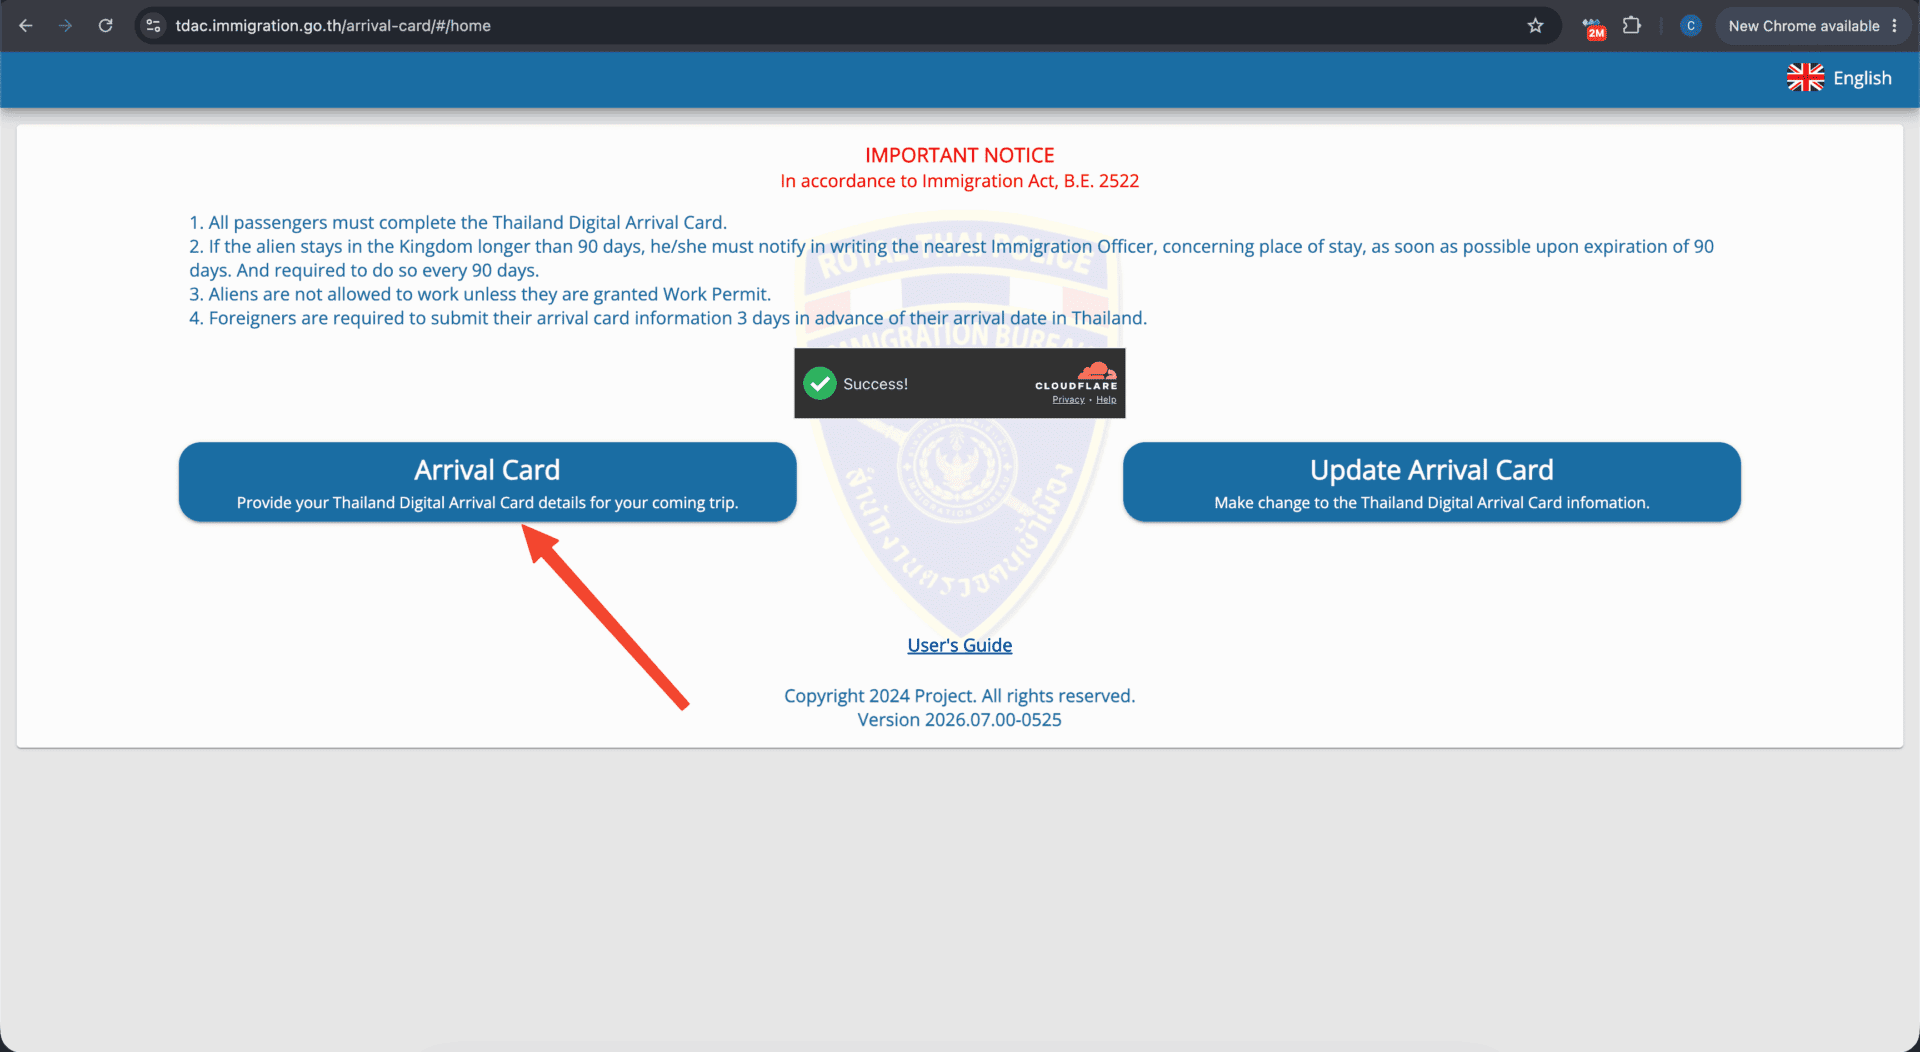
They used to hand out a paper arrival card on the plane that you filled in by hand. That’s been scrapped and replaced by the digital arrival card — the TDAC (Thailand Digital Arrival Card). It’s mandatory for all foreigners without exception, and without it you’ll have problems at the border, so we start with it.
The card is filled in online, in advance, within the 72-hour window before arrival — the system simply won’t let you submit earlier. That’s the only timing restriction, so it’s convenient to do it a day or two before your flight, once your bags are packed.
The process itself takes about ten minutes. You enter your name in Latin letters exactly as in your passport, your arrival date, your flight, and the address where you’ll be staying in Thailand (which is why it’s best to have your hotel booking on hand at this step). At the end the system generates a QR code — save it to your phone and take a screenshot, because that’s what you show at passport control.
- Official site: tdac.immigration.go.th — this one only
- Cost: free. This matters: search results are full of copycat sites that charge a “processing” fee. The official card costs nothing — any paid site is a scam
Flights: Into Thailand and — Mandatory — Out
The flight into Thailand is obvious, that’s where you start. But there’s a point that catches many people off guard: at the border you may be asked to prove that you intend to leave — a return ticket or a ticket to a third country. This is standard practice worldwide for visa-free entry, and Thailand applies it, so a return or onward ticket is a must.
Two scenarios, depending on whether you’ve locked in your dates:
- If you know your departure date — just buy a real return ticket and the question is closed
- If you don’t know (say you’re staying a while, or playing it by ear) — get a temporary ticket reservation. This is a dedicated service: you’re issued a genuine booking that stays valid for about 5 days and costs around $10 per person. It’s enough to clear the border, and you don’t have to buy an expensive fixed-date ticket. There are several “onward ticket / flight reservation” services online that do exactly this
Hotel Booking
You need a booking for two reasons at once.
First, at the border you may need to show where and for how long you’re staying.
Second, you enter the hotel address into the TDAC — meaning without a booking you can’t even complete the arrival card. So in the logic of preparation, the hotel booking comes before filling in the TDAC.
Where and what kind of place to book — I cover that below.
Visa and Length of Stay — The Most Important and Most Changeable Part
This is the point I wrote that disclaimer for at the very top. Everything here changes, and the information needs checking before every trip.
At the time of writing (mid-2026), no visa is required for tourists — the permitted length of stay is simply stamped into your passport on arrival. Under the visa-exemption scheme, travelers from a large list of countries (most of Western Europe, North America, Australia, Japan, South Korea and others) can currently enter Thailand visa-free for tourism. The exact number of days depends on your nationality, so check your own passport’s tier before you go.
⚠️ What’s changing and why everyone’s talking about it. In May 2026 the Thai government approved a cut to the general visa-free period: for the large list of countries that had a 60-day allowance, it’s being rolled back to 30 days. At the time of writing this decision had not yet taken effect — it comes into force 15 days after official publication in the Royal Gazette. The situation may change, so before you fly, check the current allowance for your specific passport on an official source: the length you’re actually granted is determined by the rules in effect on your arrival date.
📍 Where to check the status: the official notice from the Tourism Authority of Thailand (tatnews.org) and the Thai Immigration Bureau (immigration.go.th). The primary source is the Royal Gazette (ratchakitcha.soc.go.th): until the decree is published there, the previous 60-day exemption applies on entry. Note that Thailand’s MFA and many visa sites may still show the old durations — go by the effective date and by the “permitted to stay until” stamp in your passport.
Proof of Funds — Just in Case
Worth a separate mention is something that rarely comes up but is good to know about. At the border you may occasionally be asked to prove you have money for the trip. The official benchmark is 20,000 THB (about $600) per person or 40,000 THB (about $1,200) per family. It’s asked rarely and selectively, but it’s best to keep that buffer on a card or in cash so you can show it without stress if needed.
Final Document Checklist
Putting it all together, by departure you should have:
- A passport valid for at least 6 months from your entry date
- A completed TDAC with the QR code saved
- A flight into Thailand plus a return or onward ticket (or its reservation)
- A hotel booking with an address
- Travel medical insurance (why it’s essential — in the next block)
- A funds buffer: 20,000 THB (~$600) per person or 40,000 THB (~$1,200) per family (nice to have)
Follow these simple rules and you’ll have no trouble at entry.
2. Your First Day on the Ground: Connectivity, Money and Transport
Documents are what you sort out at home. Then there’s a set of basics you’ll have to handle in the very first hours after landing: get online, get some cash, and somehow get to your accommodation. These get talked about surprisingly little, yet you can’t do without them. Let’s go through them in the order you’ll actually need them.
Connectivity and Internet
You need internet right at the airport — to call a taxi, open a map, message your accommodation. The method depends on your phone.
If your phone supports eSIM — this is the most convenient option, and you can sort it out from home. Buy an eSIM online in advance on Trip.com: pick Thailand, a plan with or without a number, and the number of days and gigabytes you want. Several upsides at once — it often works out cheaper than a regular SIM, you activate it before you even fly, and you get clear setup instructions right there. The result: you walk off the plane already online, without wasting time hunting for a shop.
If your phone doesn’t support eSIM — no problem, grab a physical SIM on arrival. 7-Eleven stores are on every corner, and a tourist SIM there costs from around 99 THB (~$3). Then download the operator’s app, top up with cash at the register, and choose a plan in the app.
Money: What to Bring, Where to Change It, How to Pay
A few practical rules that save you money and hassle.
What to bring. US dollars are a universal fallback that’s always handy to carry as a reserve: they’re easy to exchange anywhere in the city at a good rate.
Where to change it. The logic is simple: change a small amount right at the airport so you have enough for the first bit and the ride, and change the bulk in the city — the rate there is noticeably better than at the airport. Pattaya has plenty of exchange booths; look for the ones with the best posted rates and solid reviews. As a rule, dedicated exchange offices beat both the airport and hotel front desks.
- Cards: a foreign card works normally — you can pay with it and withdraw cash. Just check your home bank’s foreign-transaction and ATM fees in advance (Thai ATMs also charge a fixed withdrawal fee of around 220 THB / ~$7 per transaction), and let your bank know you’re traveling so the card doesn’t get blocked
- Cash is a must: at markets, in small cafes and in lots of places cards simply aren’t accepted. You can’t get around Thailand on card alone, so always keep cash on hand
Bottom line: bring some dollars as a backup, then top up on the ground as you go. I usually carry $500 into any country just in case and almost never touch it, plus I keep a card as backup. Withdraw larger amounts less often to save on the per-withdrawal ATM fee.
Getting Around Town
There are three main ways to get around Pattaya, and they cover different needs:
- Taxis via the Grab and Bolt apps. The big plus — the price is shown up front, before the ride, so there’s no haggling and no worrying about being overcharged. The most stress-free option for a first-timer.
- Songthaews — the blue pickup-truck shared taxis that run fixed routes along the main streets. They cost from around 20 THB (~$0.60) per person and you flag them down on the move. The cheapest way to cover short distances — but for anything farther off-route drivers may quote inflated prices, so agree on the fare in advance.
- Renting a scooter — the most convenient and freeing option if you can ride. But there’s an important condition: you need an International Driving Permit with category A (motorcycle). Without it, rental shops may refuse you, and police checkpoints fine you for not having it. So if you’re planning to ride, get your motorcycle license and IDP sorted before you go.
Apps and Everyday Bits
The minimum set of apps worth installing in advance: Grab and Bolt for taxis, Google Maps for navigation, and any translator for communication. That’s enough for all everyday situations. You can also use our free travel AI, which will answer any question about your trip.
On power: Thailand’s outlets accept the common flat US-style (Type A) and round European (Type C) plugs, so most travelers won’t need an adapter — but if your plugs are the UK three-pin (Type G) or Australian (Type I) type, bring a universal adapter. And I’ll repeat the point about travel medical insurance: you must arrange it before the trip. Healthcare in Thailand is good but expensive, and any mishap without insurance hits your wallet hard.
3. Pattaya’s Neighborhoods: How to Choose Where to Stay
Pattaya is a small city, but its areas differ in character: from the loud, bar-lined center to quiet green hills. And where you settle largely shapes what kind of holiday you get. Let’s run through the areas from south to north and figure out who each one suits.
Central Pattaya
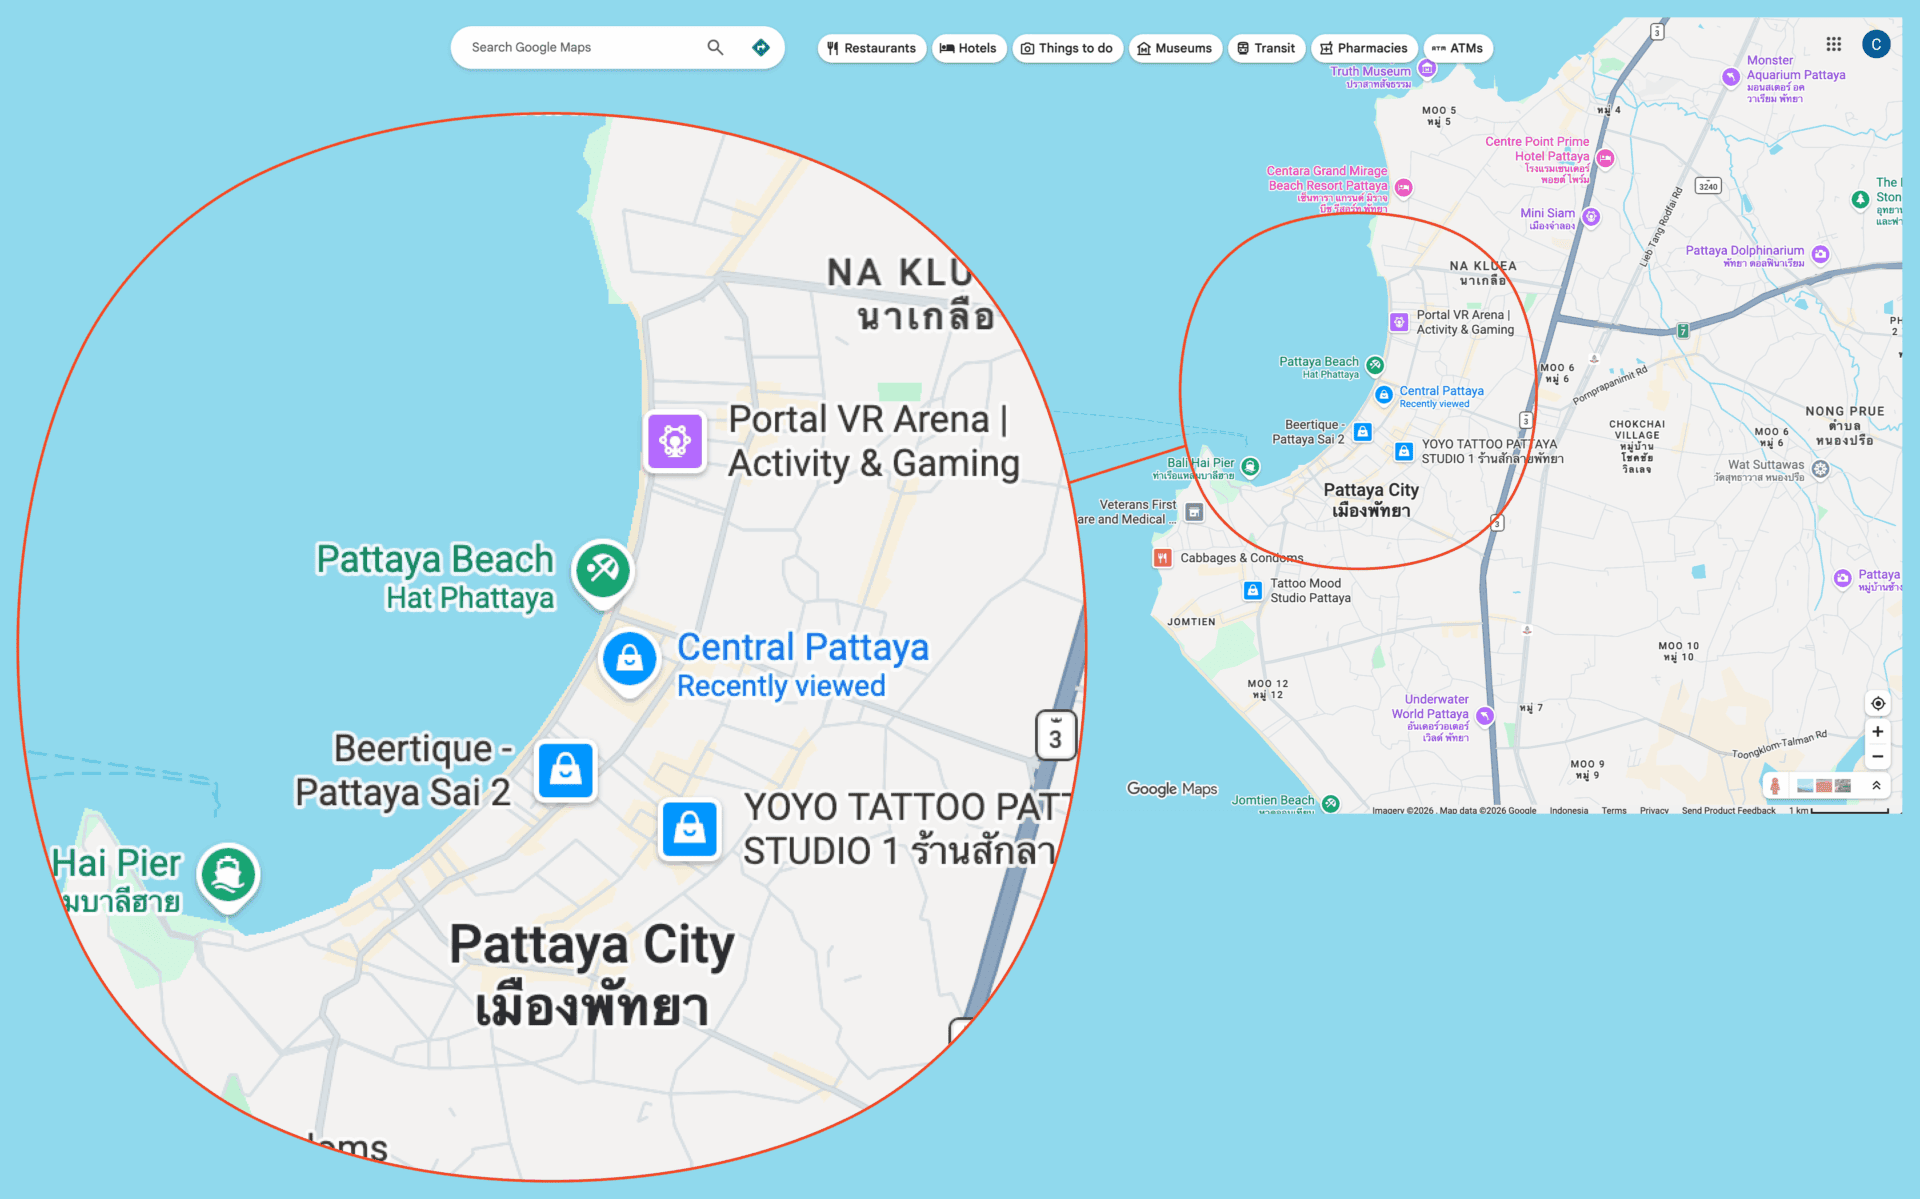
The very heart of the city, where all the action is concentrated: the famous Walking Street, malls, bars, restaurants. It’s always loud and busy. That’s both a plus and a minus — everything’s within walking distance, but don’t expect quiet.
Who it suits: those coming for the nightlife; first-timers who want to be in the thick of it with everything close by.
Jomtien
The area south of the center. Here you’ve got a long beach, noticeably calmer than the center, and plenty of residential condos and solid infrastructure — shops, cafes, everything at hand.
Who it suits: couples and families, and anyone coming long-term or to overwinter. Calm but not boring — the golden mean.
Pratumnak
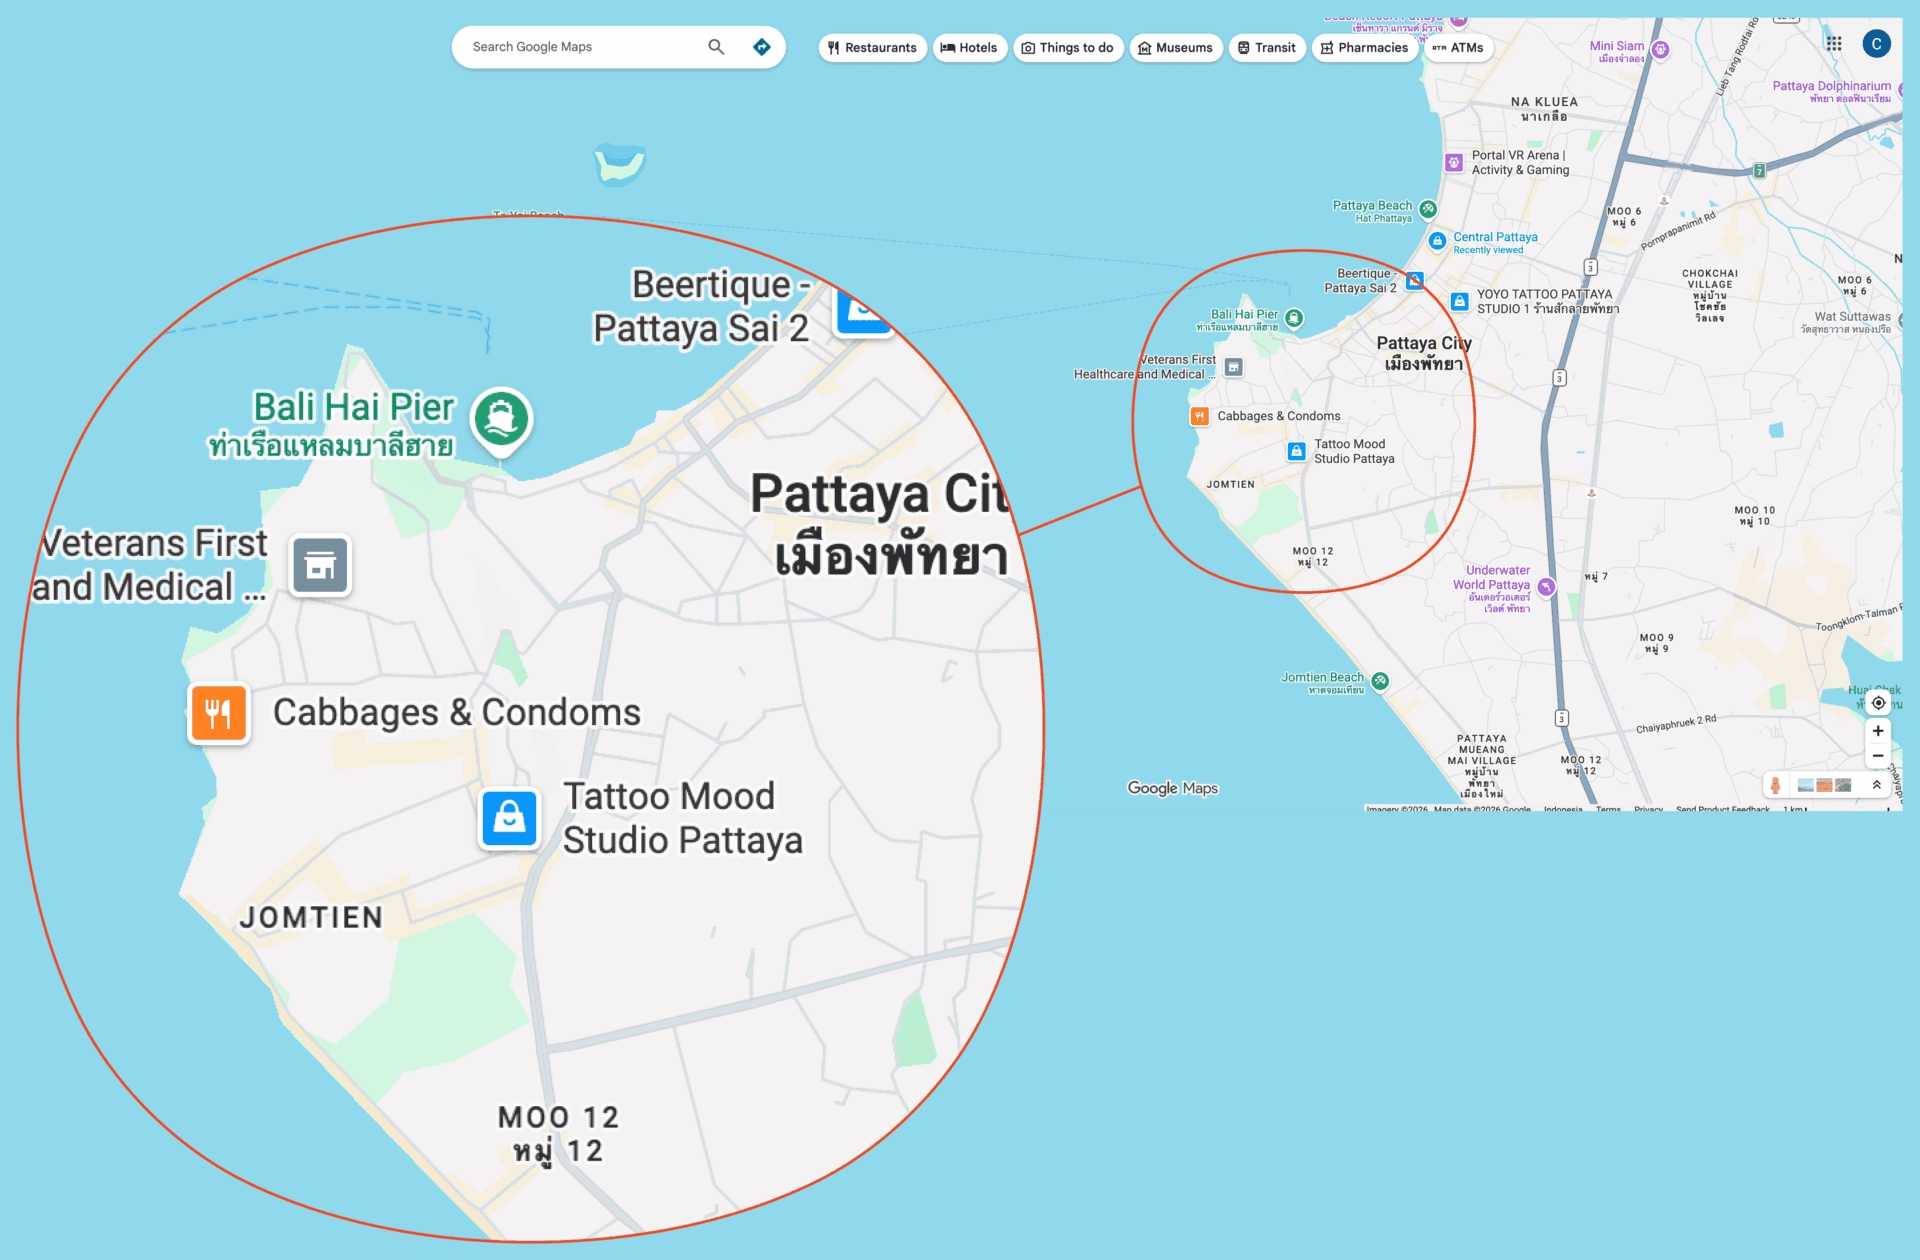
A quiet green hill sitting between Central Pattaya and Jomtien. It’s peaceful here, with decent condos and small cozy beaches. Pratumnak is home to Cozy Beach — for me one of the best beaches in all of Thailand.
Who it suits: those who want quiet and greenery but aren’t willing to be far from the center and Jomtien.
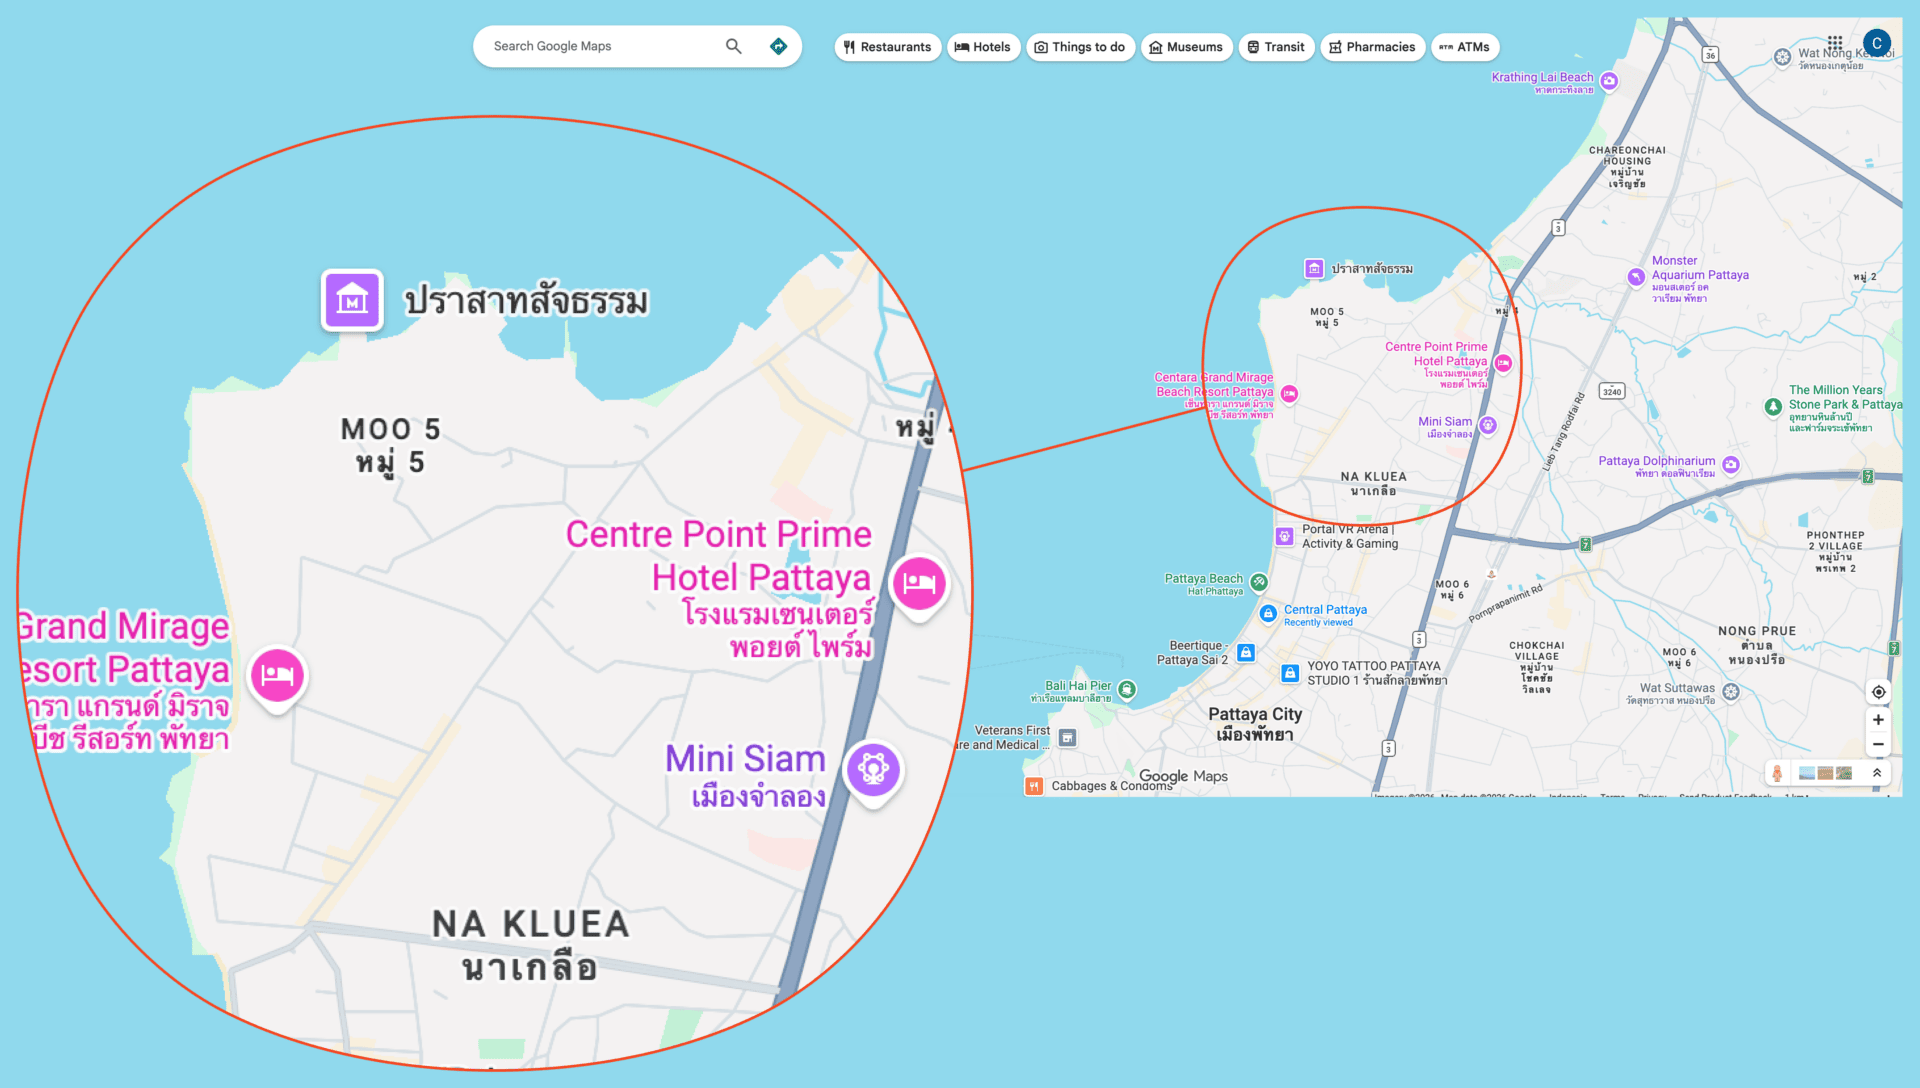
The North (Naklua)
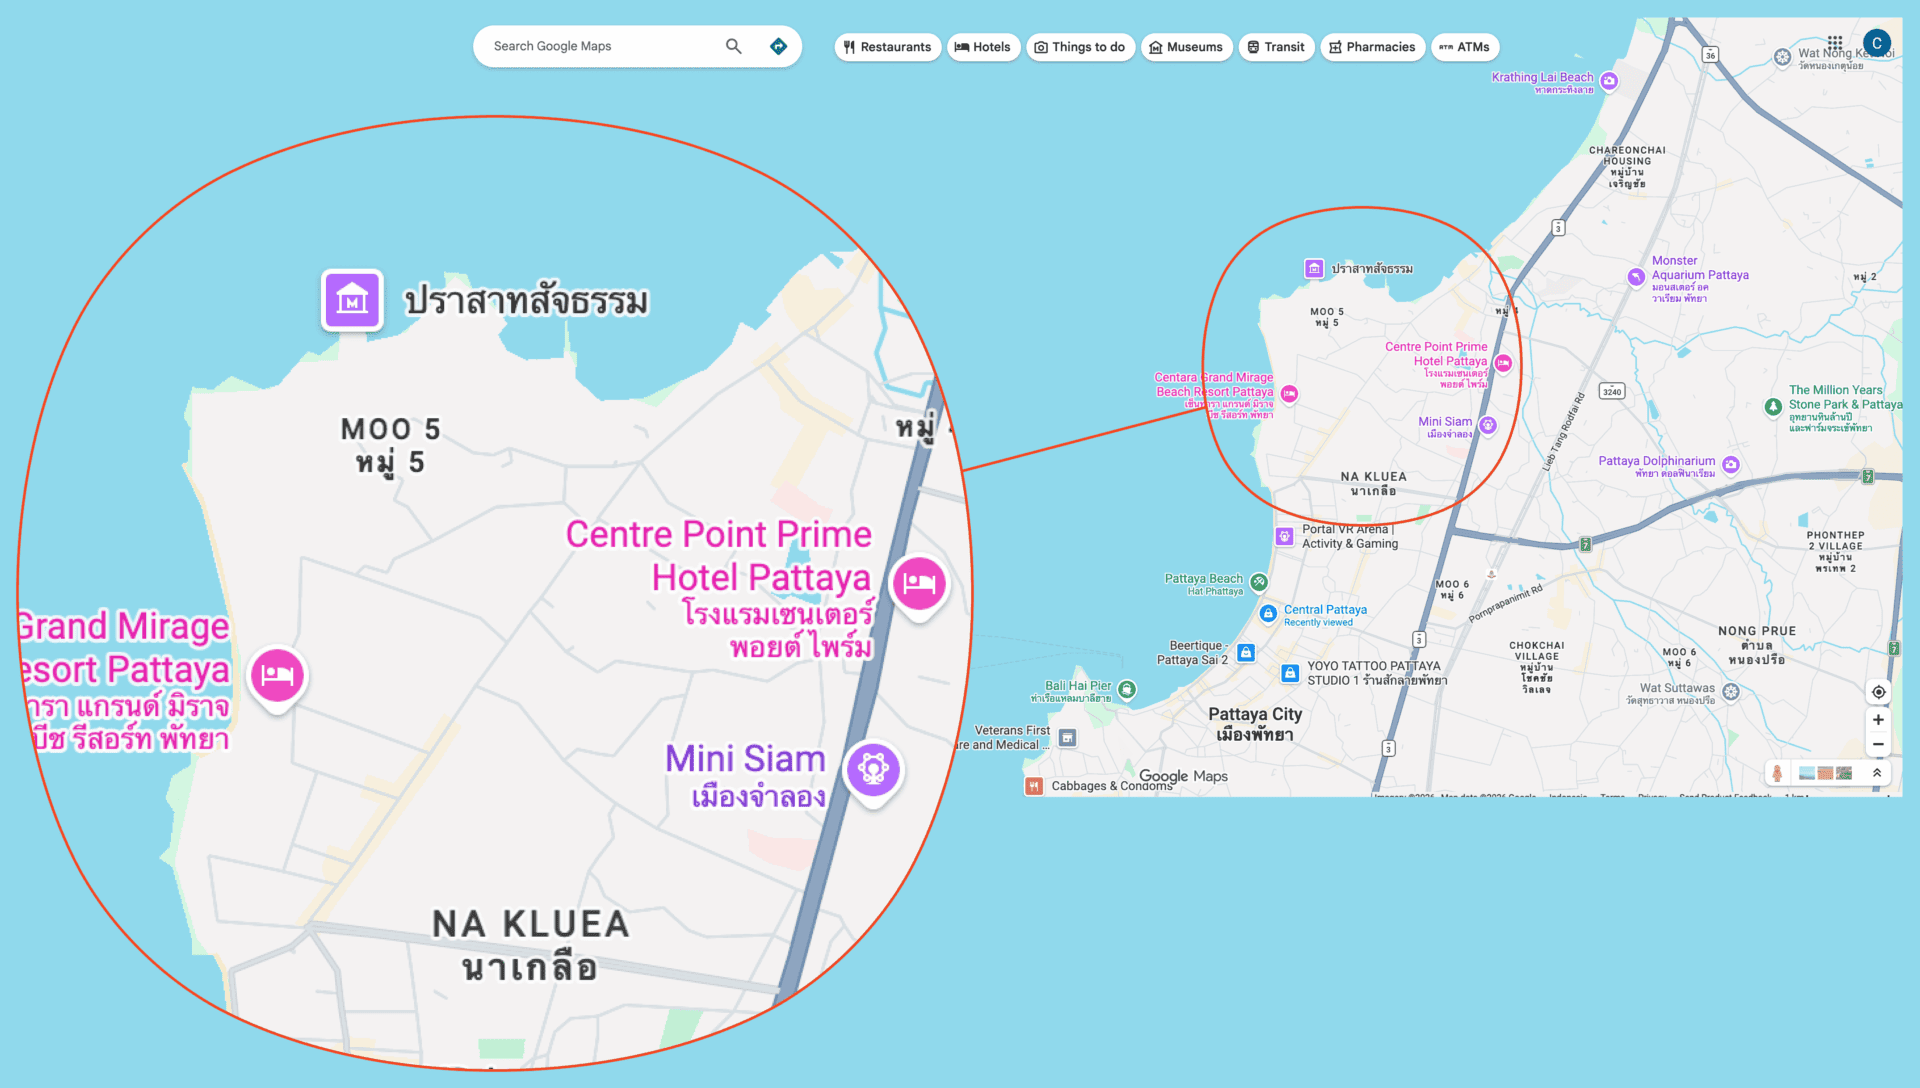
The calmest and, it feels, the priciest area. It comes across as more upscale than the rest, with lots of interesting hotels and a more laid-back atmosphere.
Who it suits: those coming specifically for a relaxed, hotel-style holiday, away from the noise.
The takeaway on neighborhoods. Here’s the point that removes half the worry when choosing: the city is so compact that it’s only about 30 minutes by scooter from the south end to the north. Everything’s close. So which exact area you stay in isn’t all that critical — go by the vibe of the hotel and your budget. But if you want ideal logistics, the most convenient pick is Pratumnak: from there it’s equally quick to reach both the south and the north.
4. Types of Accommodation and What They Cost
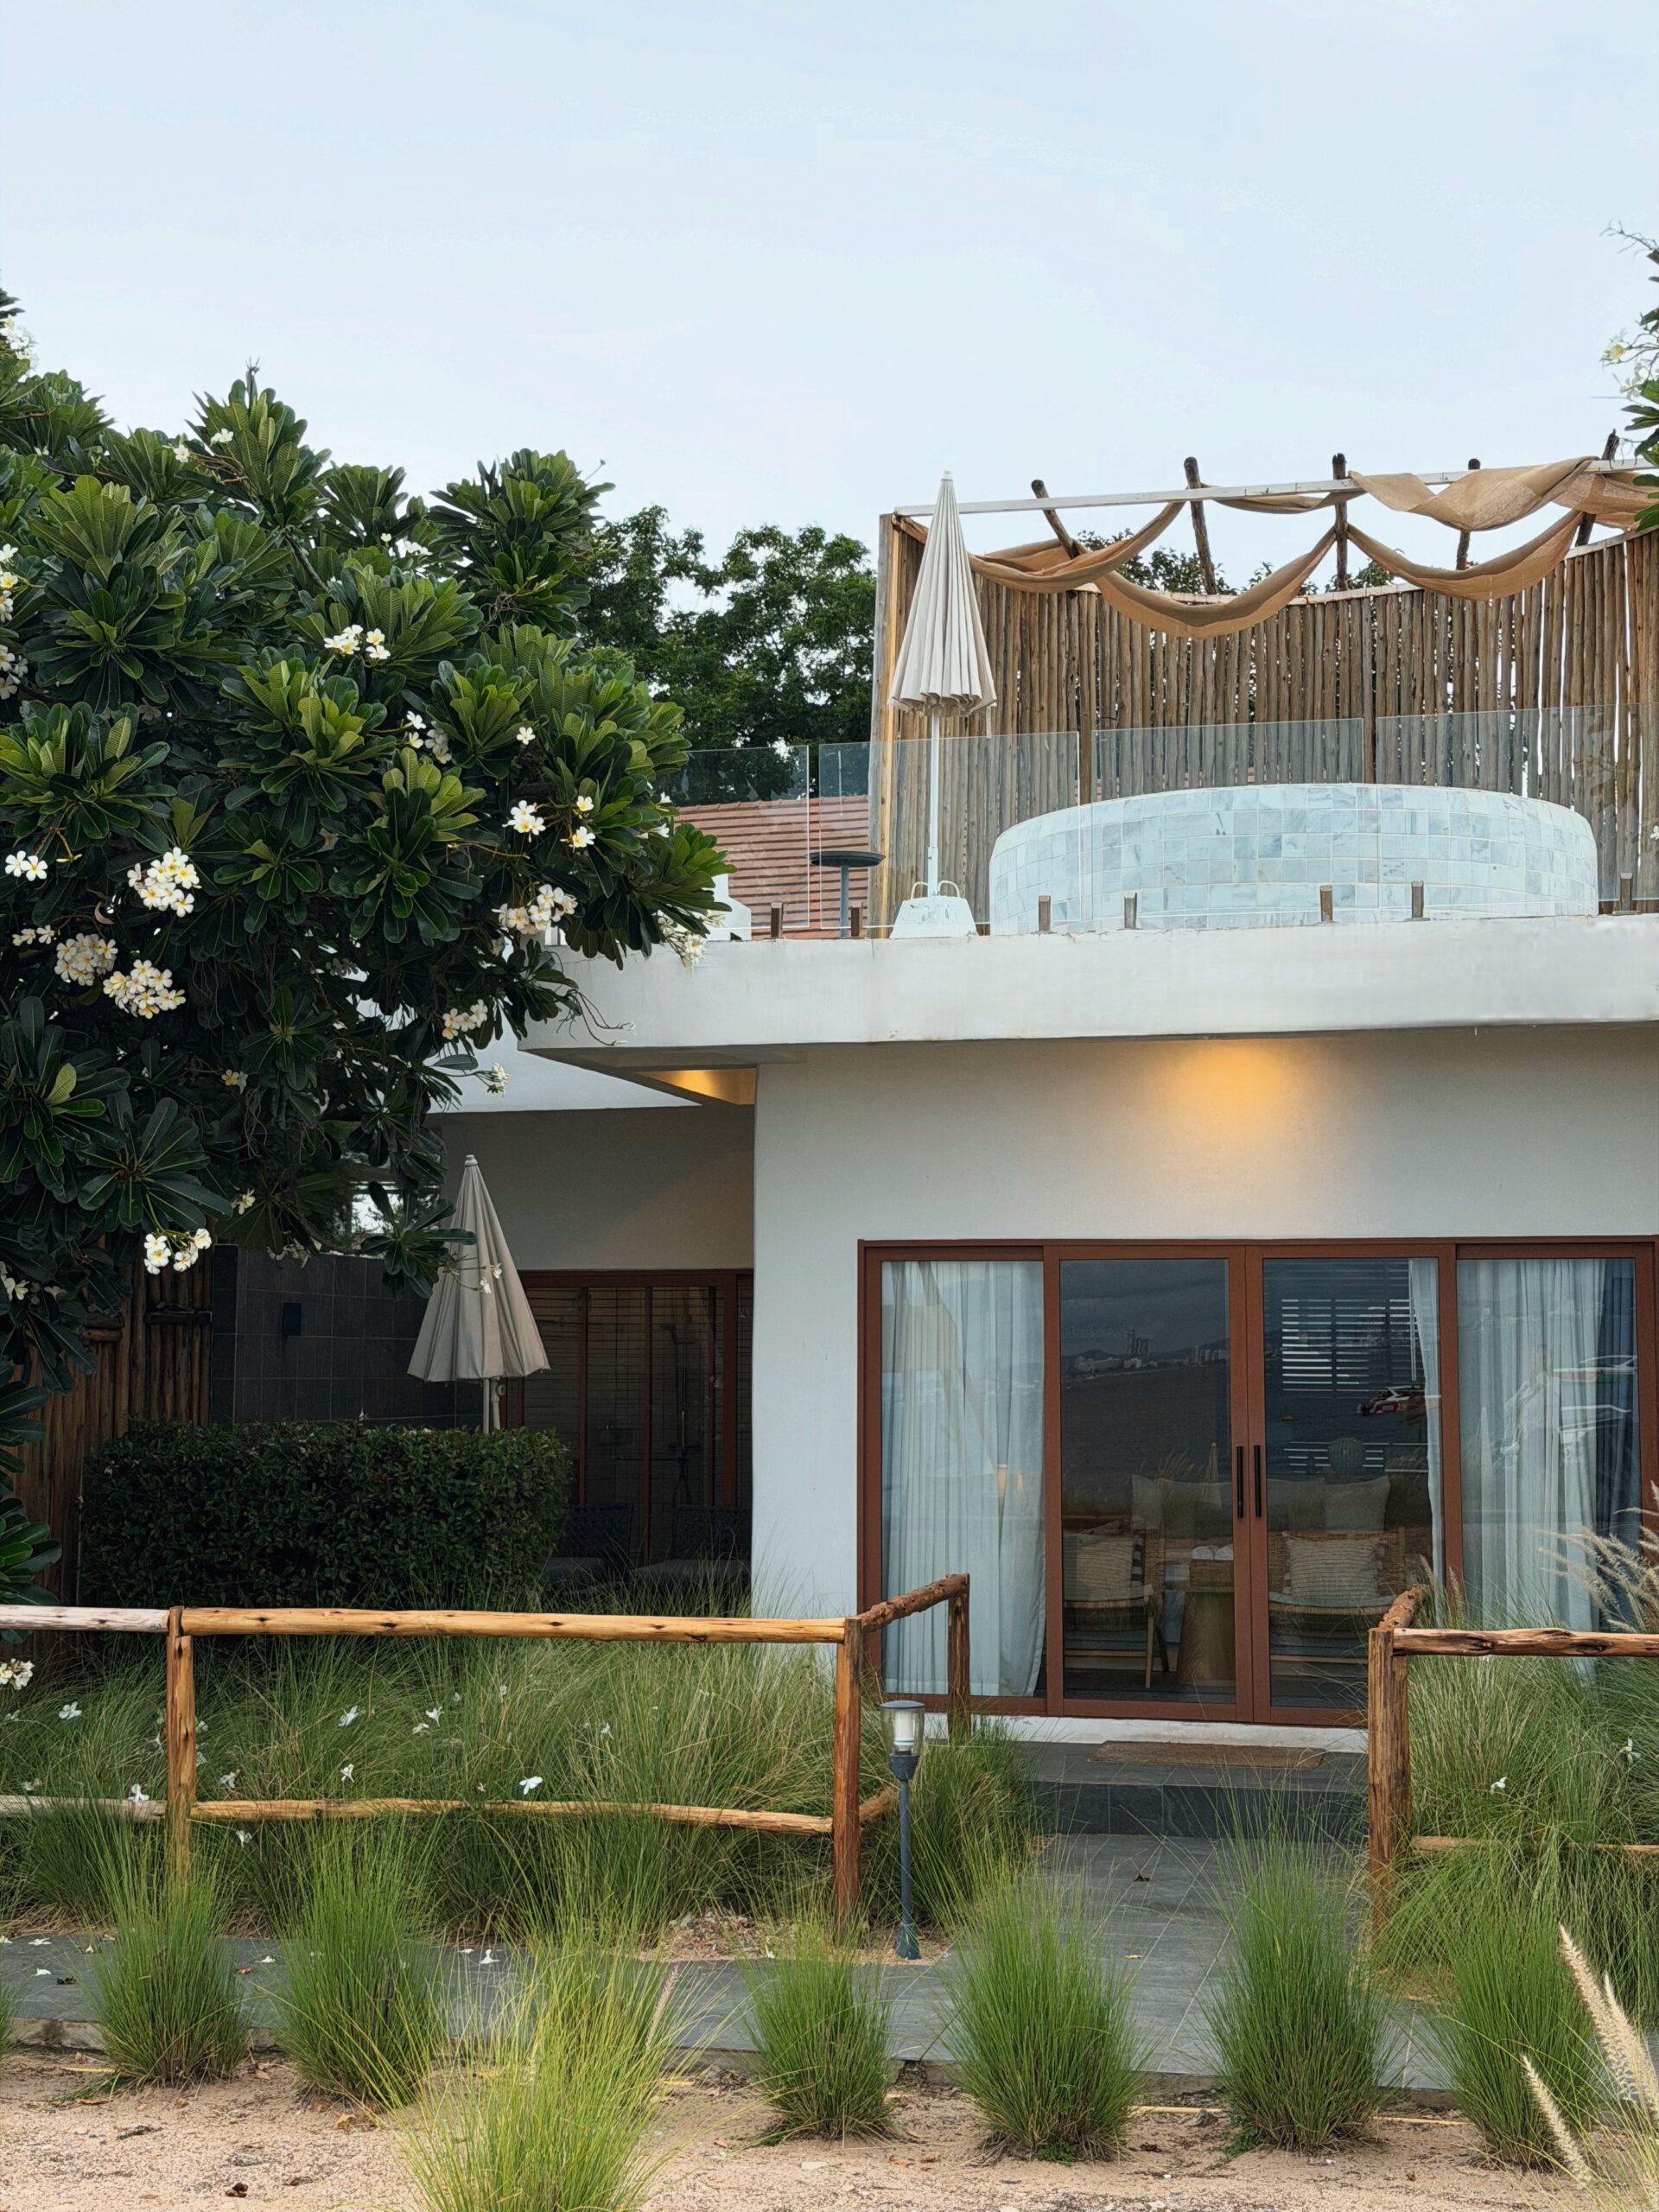
Once you’ve settled on an area — now to the type of place. Your choice depends first and foremost on how long you’re coming for.
Hotel — ideal for a short trip, roughly up to two weeks. With or without breakfast — pick by budget. An average room runs from about 1,000 THB (~$30) per night. The easiest place to search is an aggregator like Trip.com, where you can also see reviews and exact locations.
Apartments — the option for those staying long-term, a month or more. A studio can be found from around 12,000 THB (~$360) per month. One important nuance here: on the usual aggregators, monthly rentals are often pricier, whereas the best long-stay options tend to sit in local Facebook groups, Telegram channels and with local real-estate agents. If you’re coming for a long stretch, it’s worth searching there. I can share the contact of the agent we rented through — message me on Telegram at t.me/itinerarycity or via the chat on the site.
Villa — the pick for a big group or family, when you want your own space, a pool and no shared walls with neighbors.
5. When to Go: How Pattaya’s Seasons Work
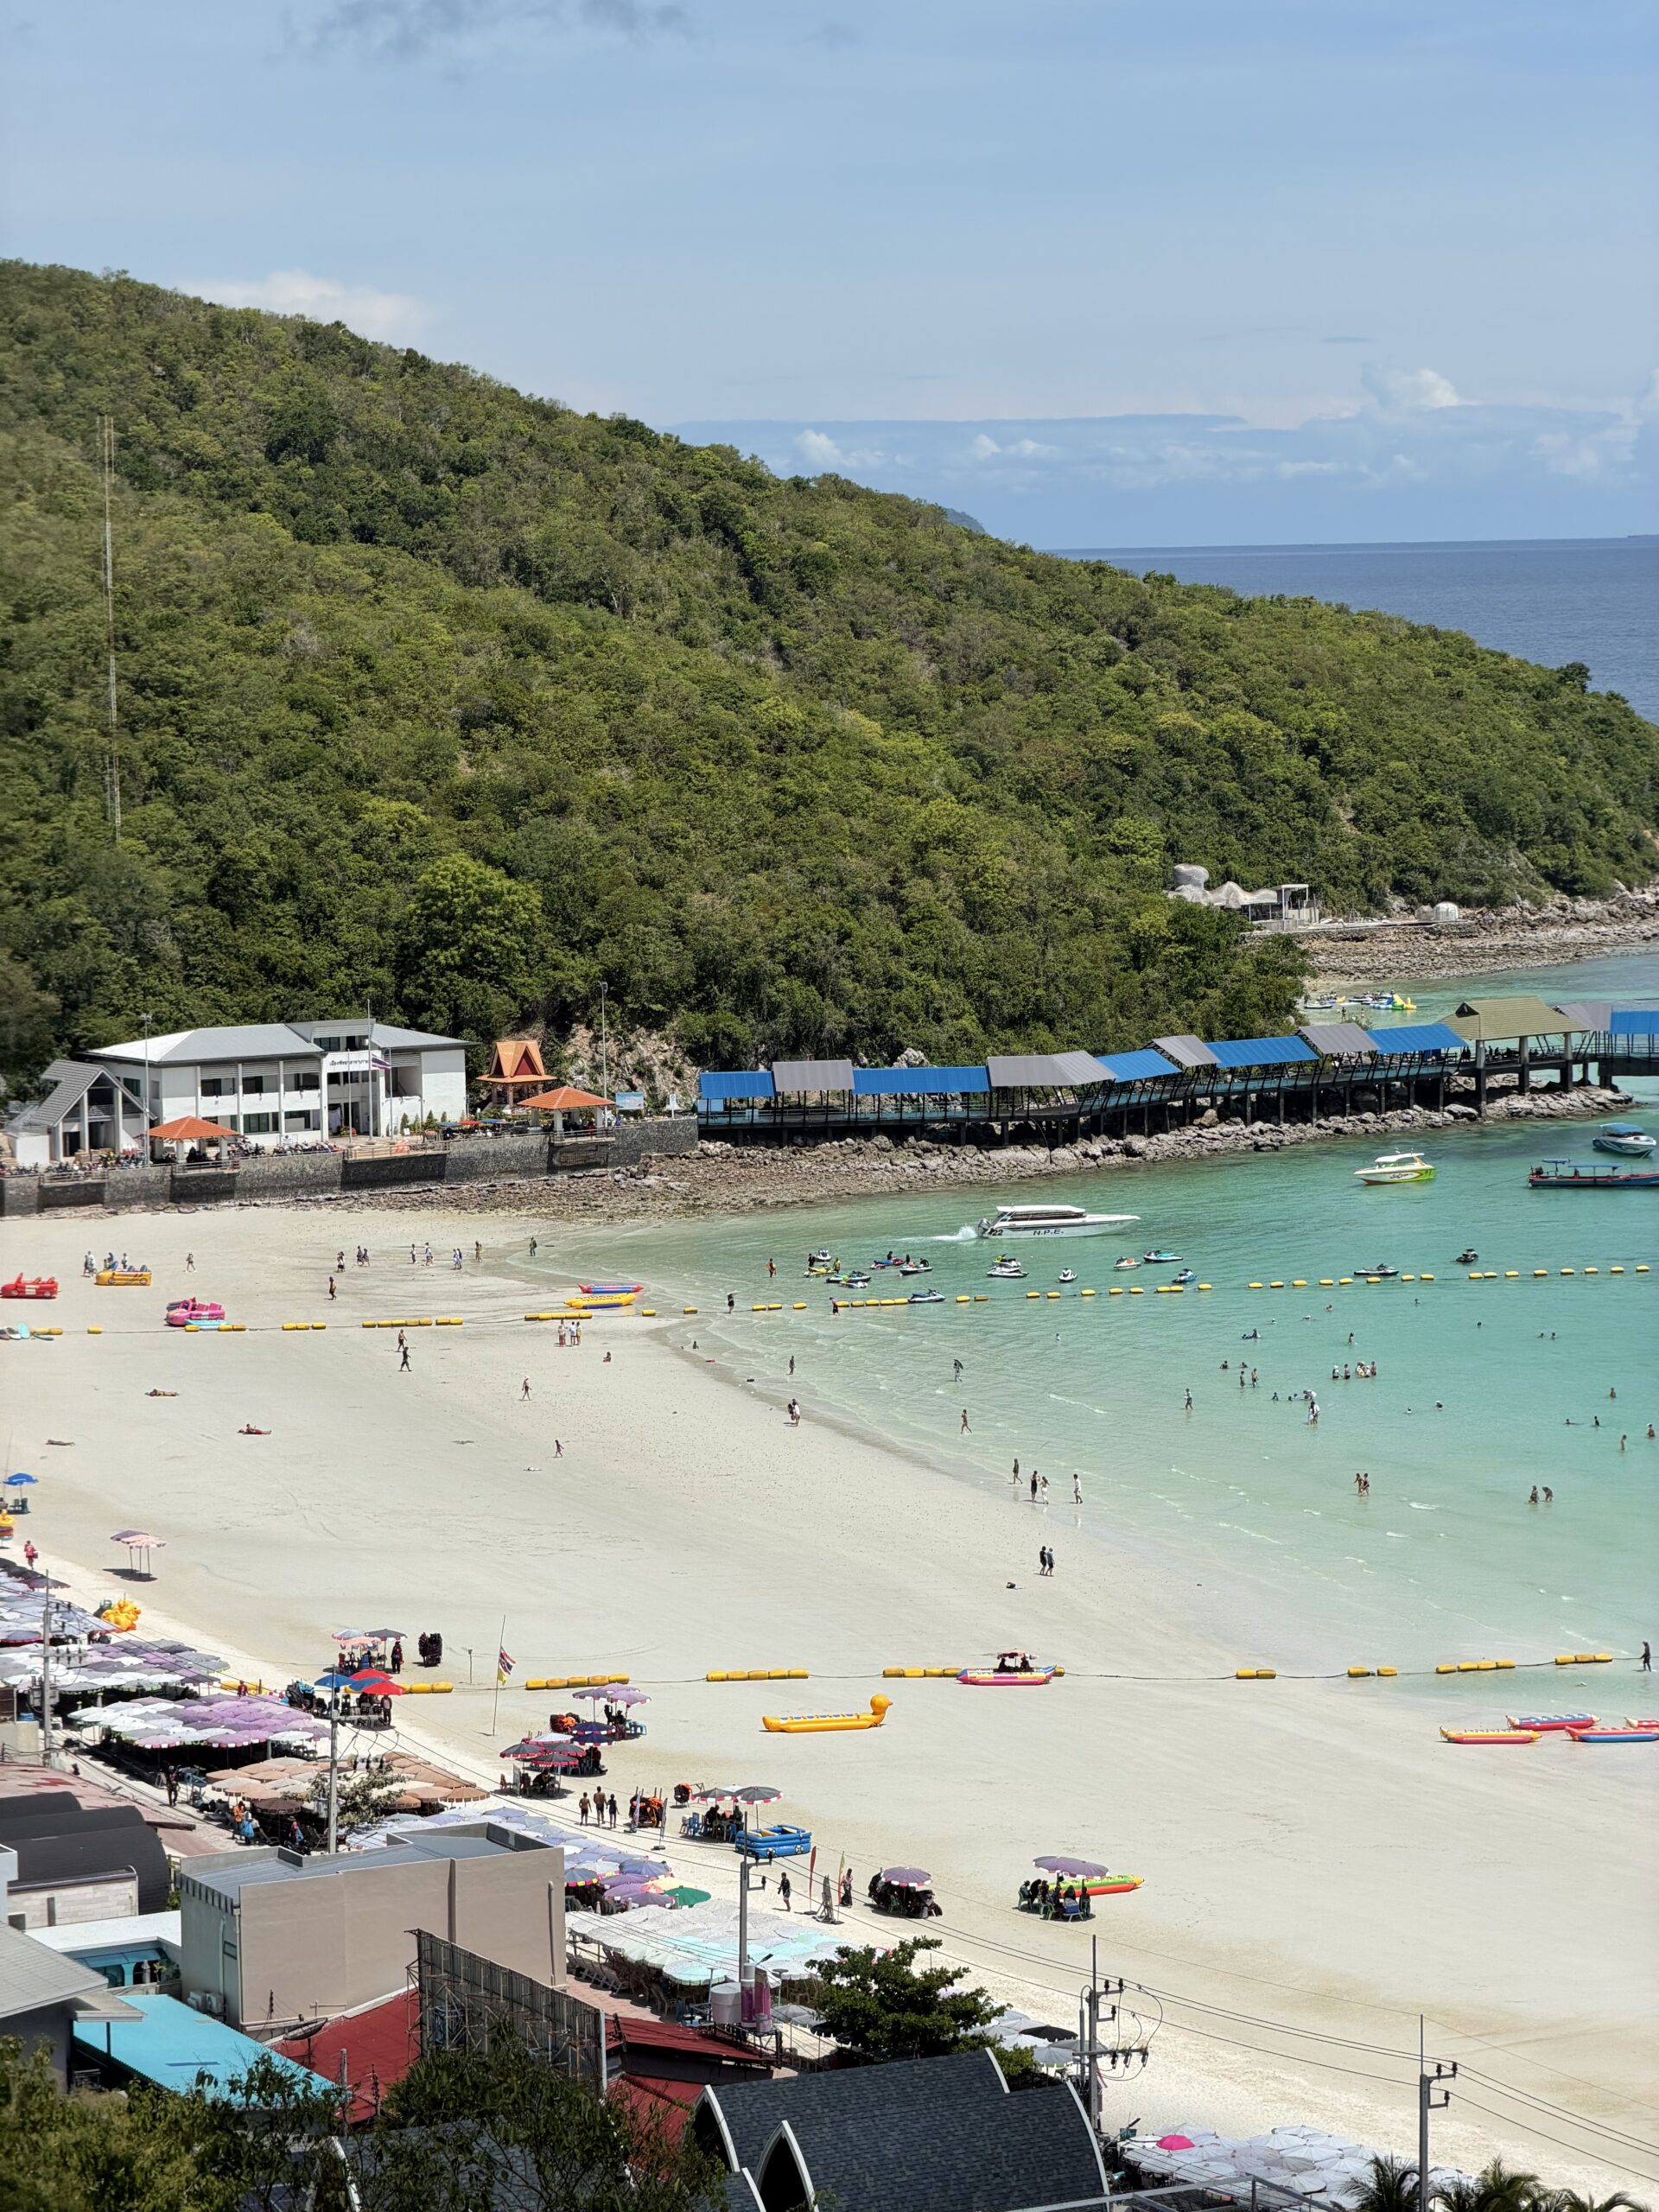
Here’s a nuance that surprises a lot of people: Pattaya’s seasons work differently than, say, Phuket’s, and the “rainy season” scares people more than it should. Let’s break down how the months actually differ.
The main thing to understand about Pattaya: there’s almost no temperature difference across the year. Year-round the air sits around +30°C (86°F) and the water around +27°C (81°F). It’s hot and warm always. What the seasons differ by are two other things — rainfall and prices. Those are what to base your dates on.
High Season: November–February
The most comfortable time. No longer scorching, almost no rain, lots of sun — ideal conditions for beaches and sightseeing. The price you pay: peak tourist numbers and the highest accommodation prices of the year.
Hot Season (also low season): March–May
In March it’s still relatively comfortable, but each month gets hotter and more humid. In April and May the heat builds to the point where it can be genuinely hard to breathe. This is low season. If you don’t handle heat well, better to skip these months.
Rainy Season (low, the cheapest): June–October
And here’s the interesting part — this is exactly the period people fear for no good reason. Rain in Pattaya is brief and usually falls at night or early morning; all-day washouts and storms are practically nonexistent. In general Pattaya gets noticeably less rain than other parts of Thailand. We lived here from mid-June to mid-July — a full month — and the rain never once ruined our plans. As a bonus, prices are low. The one exception is September, the peak of the rains. Otherwise, going in summer is a perfectly fine idea.
Bottom line: which month to pick
| Period | Weather and money |
|---|---|
| November–February | Perfect weather, but crowds and high prices |
| October and November (season transitions) | The sweet spot: price and weather in balance |
| March–May | I’d avoid it — the peak heat |
| June–August | A good option: cheap, rain doesn’t get in the way |
| September | Peak of the rains, the most debatable month |
6. What a Month in Pattaya Really Costs for Two
Now to the big question — money. I’ll break it down with concrete figures for what the two of us spent over a month. Up front: we didn’t skimp on food or entertainment, so this is the cost of comfortable living, not survival mode. Many people expect completely different numbers from Thailand — so let’s go in order. (All figures converted at roughly 33 THB to $1 at the time of writing.)
Accommodation — up to 20,000 THB (~$600)
We took a one-bedroom apartment for the month at 14,000 THB (~$425). Plus a 5,000 THB (~$150) deposit, from which they deduct the final cleaning and utilities at the end — realistically the whole deposit goes. So a sensible budget for accommodation is up to 20,000 THB (~$600).
Scooter — 7,000 THB (~$210)
We didn’t go for the cheapest option — a Honda ADV, at 5,000 THB (~$150) per month plus a 2,000 THB (~$60) deposit. All in, budget around 7,000 THB (~$210) for the scooter rental. We rented here and can happily recommend it, or search the map for whatever’s nearest you and check the reviews.
Food — about 30,000 THB (~$900)
The biggest line item. This covers absolutely everything: cafes and restaurants, evening runs to 7-Eleven (almost daily), markets, a cocktail on a walk, grocery hauls at the hypermarket, and so on. We cooked at home maybe half the time. Again — we didn’t economize at all. It came to about 30,000 THB (~$900) for the month.
Excursions and entertainment — about 10,000 THB (~$300)
Parks, islands, trips. We went out in moderation, and a lot in Pattaya is free anyway — viewpoints, temples, beaches. For the two of us over a month it came to around 10,000 THB (~$300).
Shopping — about 5,000 THB (~$150)
A bit of clothing and odds and ends. Budget around 5,000 THB (~$150) a month for spontaneous purchases.
Total
| Expense | Per month, for two |
|---|---|
| Accommodation | up to 20,000 ฿ (~$600) |
| Scooter | 7,000 ฿ (~$210) |
| Food | 30,000 ฿ (~$900) |
| Entertainment | 10,000 ฿ (~$300) |
| Shopping | 5,000 ฿ (~$150) |
| Total | ≈ 72,000 ฿ (~$2,180) for two per month |
On top of that, add flights — count those from your own city separately.
And a takeaway worth saying honestly: Thailand stopped being a cheap destination a long time ago. Today things here cost roughly the same as in most Western countries, and in places more. It’s not the ultra-budget story many people still assume by inertia. If you’re coming for a month as a couple and don’t want to limit yourself, plan around the numbers above.
7. What to See and How to Build a Route in a Minute
The last big question of any trip — what to actually see once you’re there. Usually it’s a headache of its own: you watch videos, read articles, sit in chats, follow bloggers who say “go here and here” — and then you have to pull it all together somewhere. It eats a lot of time.
We made it simpler and gathered all the top spots in one place. It works like Tinder: you see a name, description and photo — swipe left and right, mark what you like, and the service builds a route from your choices. Then you can tailor it: say you’re traveling as a couple, that you’ve only got a week, that this particular place is a must — and the route rebuilds around your inputs. All free.
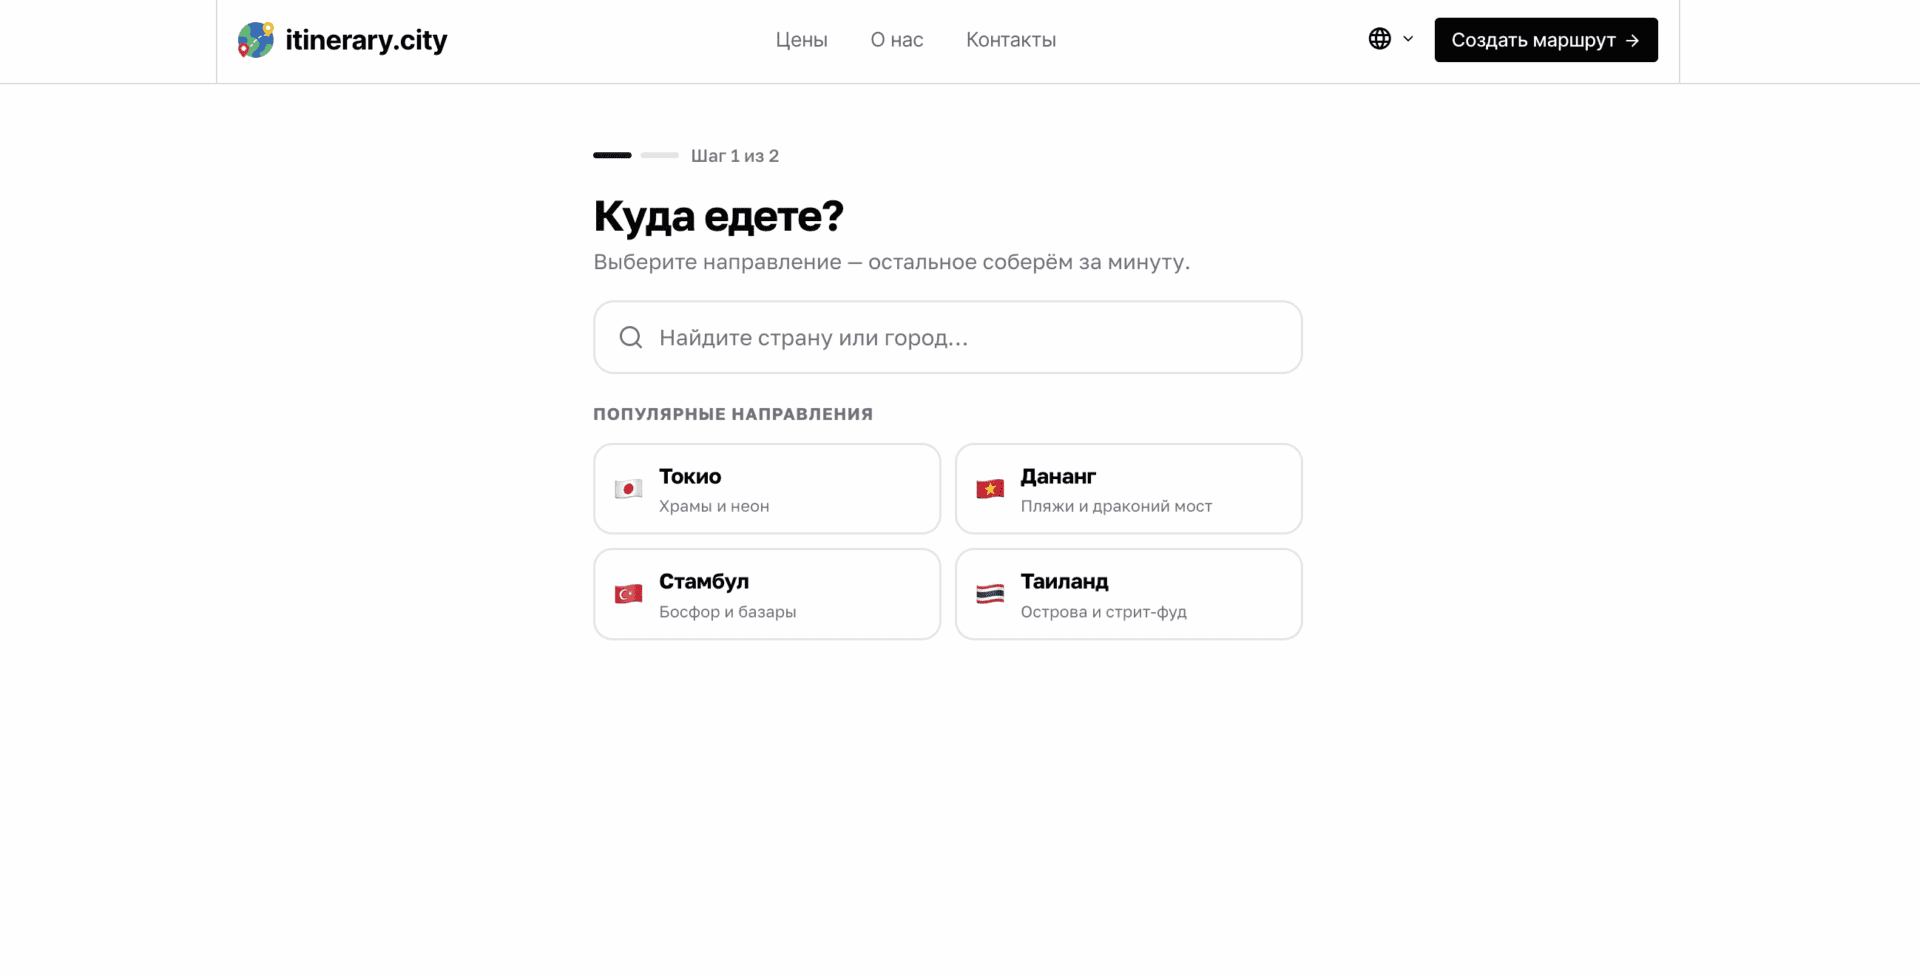
You can also read my roundup: Top 30 Attractions in Pattaya — everything with photos, map pins and descriptions, very handy 🙂
And the detailed guide to Koh Larn island — I strongly recommend a trip there; the article is a step-by-step DIY route with everything laid out clearly 🙂
Final Pre-Trip Checklist
Let’s gather the essentials into one short list so nothing slips through:
- Book a hotel (the address is needed for the TDAC)
- Fill in the TDAC within 72 hours of your flight — free, official site only
- Buy a return ticket or arrange a reservation
- Check the current visa-free allowance for your passport on an official source
- Get travel medical insurance
- Buy an eSIM in advance or grab a SIM at 7-Eleven on arrival
- Bring some US dollars as a reserve; install Grab, Bolt, Google Maps and a translator
- Sort out an International Driving Permit with category A if you plan to ride a scooter
- Build your route at itinerary.city for what you want to see on the trip
That’s it — and if you still have questions, don’t hesitate to message me on Telegram at t.me/itinerarycity or via the chat on the site!